


9 Powerful Volume Measurement Tips for Accurate Cooking
Accurate cooking is often described as a blend of art and science. While creativity plays a role in flavor combinations and presentation, precision is what ensures consistency. Among the most overlooked skills in home kitchens is proper volume measurement. A tablespoon too much flour or half a cup too little liquid can shift a recipe from perfect to disappointing.
Whether you’re baking bread, simmering sauces, or preparing delicate pastries, understanding volume measurement can dramatically improve your results. This comprehensive guide explores nine powerful tips to help you measure ingredients accurately, avoid common mistakes, and build confidence in your kitchen.
Why Volume Measurement Matters
Volume measurement determines how much space an ingredient occupies. Unlike weight, which measures mass, volume measures capacity — cups, teaspoons, tablespoons, milliliters, and fluid ounces.
In cooking (especially baking), small inaccuracies compound quickly:
- Too much flour = dense, dry baked goods
- Too little liquid = crumbly textures
- Too much salt = overpowering taste
- Too little leavening = flat results
Precision allows recipes to perform as intended.
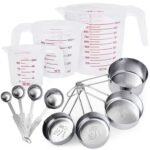
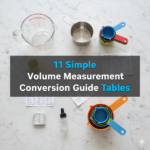
Tip 1: Use the Right Measuring Tools
Not all cups and spoons are equal. One of the most common mistakes in home kitchens is using the wrong tool for the job.
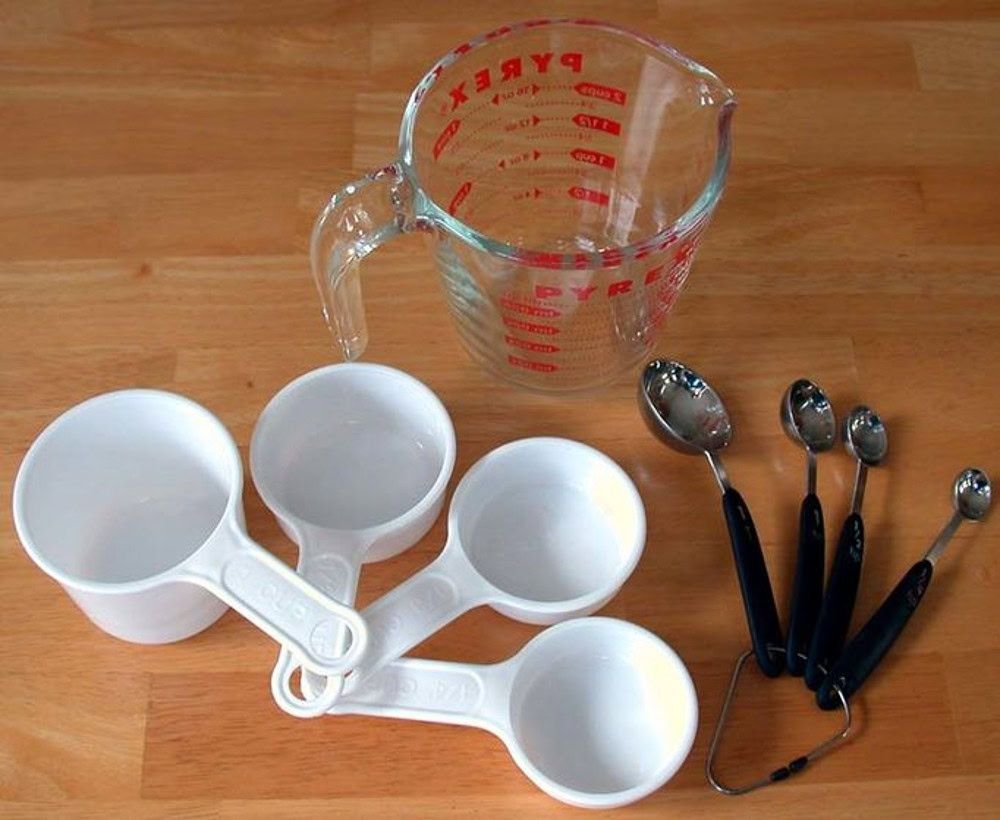
Dry Measuring Cups
- Designed to be filled to the brim and leveled off.
- Ideal for flour, sugar, oats, rice.
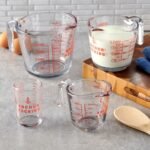
Liquid Measuring Cups
- Typically clear with a spout and measurement markings.
- Designed to measure liquids at eye level.
Measuring Spoons
- For small quantities (teaspoon, tablespoon).
- Should be filled level unless recipe specifies “heaping.”
Why It Matters
Using a liquid measuring cup for flour can lead to packing errors. Using a dry cup for oil can lead to spillage and inaccurate readings.
Table 1: Difference Between Dry and Liquid Measuring Tools
| Feature | Dry Measuring Cups | Liquid Measuring Cups |
|---|---|---|
| Fill Method | Fill and level off | Fill below rim and read at eye level |
| Best For | Flour, sugar, grains | Water, milk, oil, broth |
| Shape | Flat top, no spout | Spout, space above measurement line |
| Accuracy Risk | Overpacking | Reading angle error |
Tip 2: Level Dry Ingredients Properly
Leveling is essential when measuring dry ingredients.
The Correct Method:
- Spoon ingredient into measuring cup.
- Do not shake or tap the cup.
- Use a straight edge (knife or spatula) to level across the top.
Why Not Scoop Directly?
Scooping flour directly from the bag compacts it. This can add 20–30% more flour than intended.
Example Comparison: Scooped vs Spooned Flour
| Method | Measured Volume | Actual Weight (Approx.) |
|---|---|---|
| Scooped Directly | 1 cup | 140–160 g |
| Spooned & Leveled | 1 cup | 120–125 g |
That difference can ruin cakes and cookies.
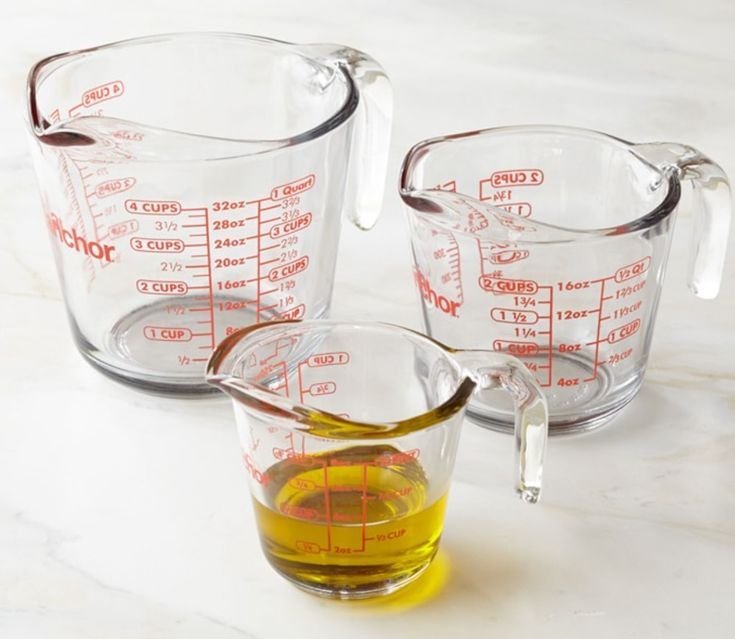
Tip 3: Measure Liquids at Eye Level
When measuring liquids:
- Place cup on flat surface.
- Bend down to eye level.
- Read measurement at the bottom of the meniscus (the curved surface of liquid).
Why This Matters
Looking from above can make it appear fuller than it is. Looking from below makes it appear underfilled.
Visual Reference Chart
Incorrect (Viewed from Above)
Liquid appears higher than actual level.Correct (Eye Level)
Read at bottom curve of liquid surface.Incorrect (Viewed from Below)
Liquid appears lower than actual level.
Tip 4: Understand Ingredient Density Differences
Not all cups are equal in weight. One cup of flour does not weigh the same as one cup of sugar.
Table 2: Common Ingredient Volume-to-Weight Reference
| Ingredient | 1 Cup Weight (Approx.) |
|---|---|
| All-Purpose Flour | 120–125 g |
| Granulated Sugar | 200 g |
| Brown Sugar | 220 g (packed) |
| Butter | 227 g (2 sticks US) |
| Honey | 340 g |
| Milk | 240 g |
Understanding density helps explain why careful measurement matters.
Tip 5: Know When to Pack Ingredients
Some ingredients must be packed; others must not.
Pack These:
- Brown sugar
- Shortening
- Grated cheese (sometimes, depending on recipe)
Do NOT Pack:
- Flour
- Powdered sugar (unless specified)
- Cocoa powder
Packing brown sugar removes air pockets, ensuring proper sweetness and moisture balance.
Packing Comparison
| Ingredient | Pack? | Reason |
|---|---|---|
| Brown Sugar | Yes | Ensures consistent sweetness |
| Flour | No | Prevents dense baked goods |
| Powdered Sugar | Usually No | Avoid over-sweetness |
Tip 6: Convert Carefully Between Units
Recipes may use:
- Cups
- Fluid ounces
- Milliliters
- Tablespoons
- Teaspoons
Essential Conversions
| Measurement | Equivalent |
|---|---|
| 1 cup | 16 tbsp |
| 1 tablespoon | 3 tsp |
| 1 cup | 240 ml |
| 1 fluid ounce | 30 ml |
| 1 cup | 8 fl oz |
Quick Reference Chart
1 Cup
= 16 Tablespoons
= 48 Teaspoons
= 8 Fluid Ounces
= 240 Milliliters
Accurate conversion prevents imbalance in scaled recipes.
Tip 7: Adjust for Altitude and Humidity
Environmental conditions influence measurement effectiveness.
High Altitude Effects:
- Liquids evaporate faster
- Leavening reacts differently
- Baking time may decrease
High Humidity Effects:
- Flour absorbs moisture
- Sugar clumps
- Dough becomes sticky
Adjustment Suggestions
| Condition | Suggested Adjustment |
|---|---|
| High Altitude | Reduce baking powder slightly |
| High Humidity | Reduce liquid by 1–2 tbsp |
| Dry Climate | Add 1–2 tbsp liquid |
Understanding your environment improves consistency.
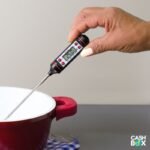
Tip 8: Use Weight for Precision (When Possible)
While this article focuses on volume, serious bakers often switch to weight for accuracy.
Why Weight Is More Reliable
- Eliminates density variation.
- Reduces compaction error.
- Provides repeatable results.
Volume vs Weight Accuracy Comparison
| Factor | Volume | Weight |
|---|---|---|
| Density Variation | Affected | Not affected |
| Packing Error | Possible | None |
| Consistency | Moderate | High |
| Professional Use | Limited | Standard |
If precision matters deeply (bread, macarons, pastries), use a kitchen scale.
Tip 9: Keep Measuring Tools Calibrated and Clean
Measuring tools wear out over time.
Check for:
- Faded measurement lines
- Warped plastic cups
- Bent metal spoons
Simple Calibration Test
To test 1 cup measurement:
- Weigh empty cup.
- Fill with water to 1-cup line.
- Weigh again.
1 cup water should weigh about 240 grams.
If it’s significantly off, replace the tool.
Common Volume Measurement Mistakes
1. Tapping the Cup
Compacts dry ingredients.
2. Estimating “Close Enough”
Baking is chemistry — small errors matter.
3. Confusing Fluid Ounces and Ounces
Fluid ounces measure volume.
Ounces measure weight.
4. Using Coffee Mugs as Cups
A standard US cup = 240 ml.
Many mugs hold 300–350 ml.
Master Volume Measurement Checklist
Before starting any recipe:
- ✔ Use correct measuring tool
- ✔ Spoon and level dry ingredients
- ✔ Measure liquids at eye level
- ✔ Check ingredient packing instructions
- ✔ Confirm unit conversions
- ✔ Adjust for climate if needed
Sample Measurement Impact Scenario
Let’s look at a cake recipe requiring:
- 2 cups flour
- 1 cup sugar
- 1 cup milk
If flour is overpacked by 20%:
| Ingredient | Intended | Actual Used |
|---|---|---|
| Flour | 240 g | 288 g |
| Sugar | 200 g | 200 g |
| Milk | 240 g | 240 g |
Result:
- Dense texture
- Reduced rise
- Dry crumb
Small measurement differences create noticeable results.
Practical Exercise: Test Your Accuracy
Try this:
- Measure 1 cup flour using scoop method.
- Weigh it.
- Measure again using spoon-and-level method.
- Weigh again.
Most people are surprised by the difference.
Long-Term Benefits of Accurate Volume Measurement
- Consistent flavor
- Improved baking texture
- Reduced ingredient waste
- Better scaling for large batches
- Increased confidence
Cooking becomes more predictable and enjoyable.
Frequently Asked Questions (FAQs)
1. Why does my cake turn out dense even when I follow the recipe?
Most likely cause: overmeasured flour. Scooping flour directly can add excess weight, making batter too thick and heavy.
2. Can I use a regular cup instead of a measuring cup?
It’s not recommended. Standard kitchen measuring cups are calibrated to specific volumes (usually 240 ml per cup). Household cups vary significantly.
3. Should I always pack brown sugar?
Yes, unless a recipe says otherwise. Brown sugar should be firmly packed so it holds its shape when removed from the cup.
4. Is weighing ingredients better than measuring by volume?
For baking, yes. Weight removes variables like density and compaction. For casual cooking, volume measurement is usually sufficient.
5. Why do professional recipes use grams instead of cups?
Grams provide precision and universal consistency. Cups vary slightly by country, but grams are standardized worldwide.
6. How often should I replace measuring tools?
Replace them if:
- Measurement lines fade
- Plastic warps
- Tools bend
- Calibration test shows inaccuracy
Final Thoughts
Accurate volume measurement is one of the most powerful skills you can develop in the kitchen. It transforms guesswork into reliability and frustration into success. While it may seem minor, precision influences flavor, texture, rise, and moisture.
The difference between a good recipe and a great one often comes down to how carefully ingredients are measured. Master these nine tips, and you’ll notice immediate improvements in your cooking and baking results.
Consistency builds confidence — and confidence builds better meals.